Originally when I decided to try and attach some pretty flowers to my booties, I went to the library to search for some flower patterns. I found an entire book on crochet flowers, but surprisingly, none of them was quite what I wanted. So I started searching online. The technique for most that I liked was the same, but depending on the size and number of petals, and the type of stitches used, the look greatly varies. I experimented a lot and came up with what I think is the perfect little rosette to attach to my little baby booties:
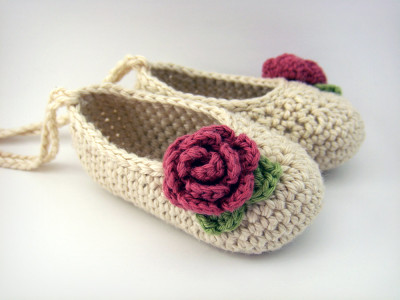
And best of all, the pattern is included in today’s post!
I like to use fingering weight yarn, the stuff used for socks, and a c2 (2.75mm) size hook, for extra snug little stitches. You can really use any yarn and hook you like, but I think the fingering weight gives the petals a nice delicate look to the petals, and snug (a bit tight) stitches hold the whole shape together nicely.
and FYI:
sc=single crochet
dc=double crochet
ch=chain
Ok let’s get started….
1. Chain 27
2. Skip first 4 chains, sc in 5th ch from hook, and (ch2, skip 1ch, 1sc) across
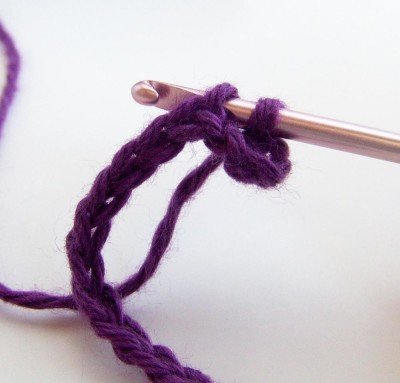
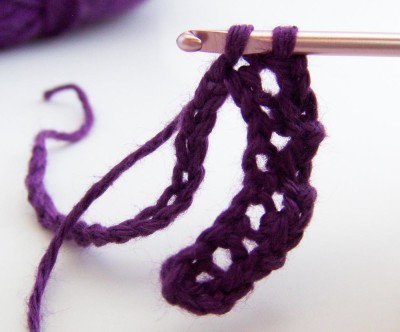
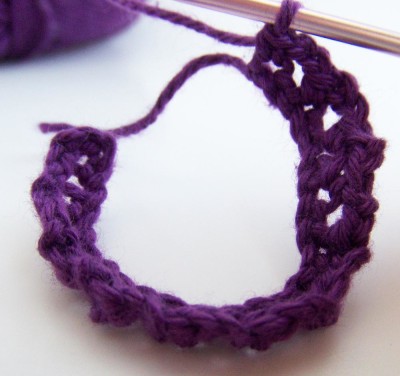
3. Turn piece. (sc, ch1, 3dc, ch1, sc) in each ch2 space across (as well as the final ch 4 space).
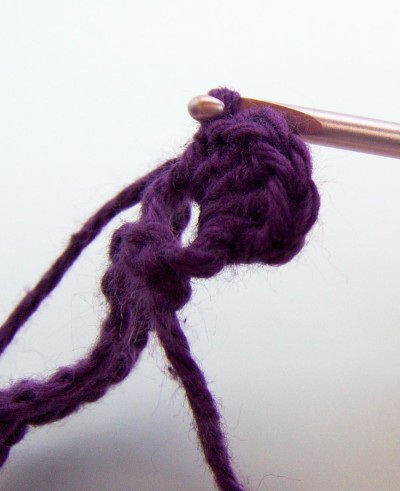
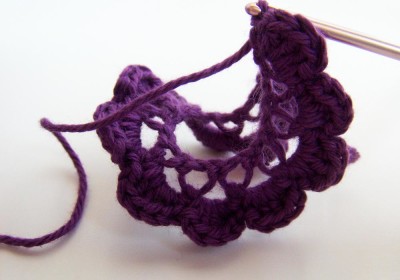
4. That’s all of the crocheting. Finish off, leaving a long tail, and threading the tail through a needle (the tail will be used to sew it all together).
5. Now, holding the short beginning tail in your hand, begin to turn the piece to form your flower.
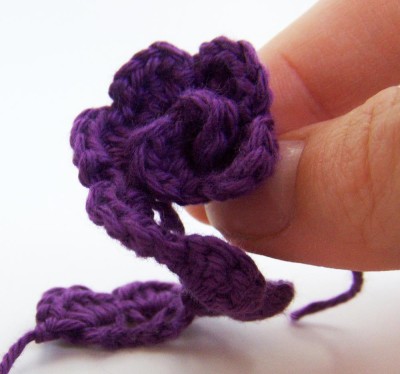
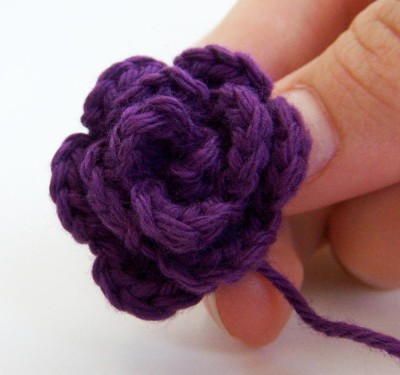
6. Last step, sew the petals together using your long tail and needle. Keep your stitches at the base of the petals, and start with the 2 outer layers. Stitch them in a few places around the flower. Then put the needle through the entire flower a few times in a few different areas to capture the inner petals as well.
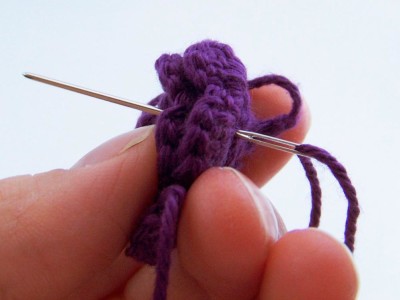
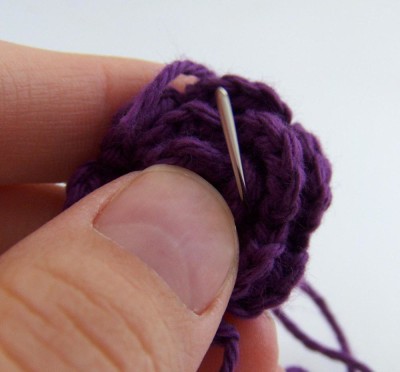
Check to make sure everything is secure, and that’s it! A sweet little rose!
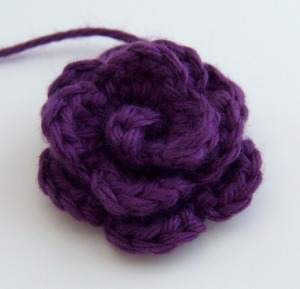
Here’s the pattern again, without all the images:
1. Ch 27
2. Skip first 4 ch, sc in 5th ch from hook, (ch2, skip 1 ch, sc) accross.
3. Turn piece, (sc, ch1, 3dc, ch1, sc) in each ch2 space accross, and also in ch4 space at the end.
4. Finish off, leaving a long tail, and threading tail through a needle.
5. Form flower by holding short beginning tail and turning the petals around.
6. Using the long tail, sew petals in place, beginning with outer 2 layers of petals, and finishing with a few stitches to hold all layers together.
This pattern can be adapted in all sorts of ways. Add extra chains to step one for additional petals. Use more chains and skip more stitches in step 2 and you can crochet larger petals in stage 3. There are many possibilities, I’ve had fun (and some frustration) exploring those possibilities myself.
One note if you decide to experiment: if you have a larger number of petals, it will be much better to ‘sew as you go’ rather than just sticking the needle through the center to attach the petals together. The flower will turn out prettier and more secure if you stitch every couple of petals as you wrap the petals around. I will show you exactly what I mean later when I add more flower patterns. Hopefully that will be before long!
That’s it for today. Let me know what you think!
My Flower Baby Ballet Flats are on sale now on Etsy: http://www.etsy.com/shop/JennOzkan
Bootie Patterns are hopefully soon to come to my Etsy shop, please let me know if you would be interested in that as well.
Awesome. Thank you for sharing.
[…] SMALL ROSETTE: Free crochet pattern […]
Thank you
Gmichele1267@gmail.com I love your work I will be doing a rose for my new granddaughter hat.
mlhjosh@gmail.com
Georgeous! Even i could follow the pattern! I used a scrappy length of white cotton and the result is fabulous, thank you so easy instructions.
Love this flower and the instructions were easy to follow…even for a beginner. Thanks!
S koelvloeistofcirculatie in uw gehele koelcircuit van de auto.
Gietijzeren radiatoren geen mechanische onderdelen zodat ze duurt vele jaren. Om te zoeken naar de beste auto
technicus, het kiezen van een geweldige autoreparatie store is noodzakelijk.
ho usato la tua rosa per in capellino della mia nipotina, grazie Lisa
[…] Flower pattern and Skull pattern. The bag is same pattern as previous bags, eg Black Wool Tote Bag. The bags do come up quite small, approx 12 in / 30 cm across at widest point. When I get my 12 mm hook and more chunky wool I will experiment with making them larger! […]
[…] And rose pattern is -here- […]
I love this pattern. My flowers turned out great and I can’t wait to experiment with extra petals and such. Thank you!! Looking forward to more flowers!
Recently, I joined a club that crocheted beanies for preemie babies. I wanted a flower that was easy and quick. For preemie hat, I chained 14 instead of 27. Flower was small and perfect for preemie hat. Thanks you!!!
I am making the crocheted quilt square lap quilt and this rose is perfect at the joining of the squares. Thanks so much!
Please please please, we would love the pattern
am so excited – having a baby granddaughter after 6 grandsons and making these, pink at last!
[…] SCHEMAT różyczki […]
thank u so much for the pattern. I searched and searched until i found it
this is a beautiful colour flower. Thank you.
very nice, seems fairly easy I’ll have to give it a try. Thank u for sharing.
Thank you Jenn! 😊 I’ve been looking for ages for a small rosette pattern. All the ones I tried up to now have made enormous roses.
[…] References/Inspirations (where applicable): Pattern – Small Rosette by Jenn Ozkan […]
Love your little rosette pattern. Thank you
[…] References/Inspirations (where applicable): Pattern – Small Rosette by Jenn Ozkan […]
Thank you so much for this pattern. I have been searching for 2 days for a small rosette pattern for a project. This is very easy and instructions were great for a beginner. I am making a quilt with 5″ quilted squares. I then blanket stitched around the squares and single crocheted around the squares, then double crocheted around again. I will be attaching the squares with a running stitch. Then I will be scalloping around the entire quilt. The rosettes will be placed in each corner of the squares where they meet. Can’t wait until I can finish it now. The rosettes were the last step that I hadn’t figured out. I am making two, one for my mother and one for my mother-in-law for Christmas.